
Build Your Own Small Animal Cage They'll Love!
Super Affordable, Budget-Friendly, Hand-Made Cages


Do you have a small animal, or multiple small animals, and are looking to upgrade their living conditions? Then you've come to the right place! If you're handy with a hammer and nails, or know someone who is, then let's get started.
Walking into pet stores today, you'll find that not only is buying an animal expensive, but the cages available in store are also very expensive! When you break it down, they are usually just a hunk of plastic, with some bars, and usually break your bank. Well, I'm going to show you how I built one of my guinea pig's cages, from scratch, at a super affordable price.
Basic things you will need to start:
Wood
Drill (or Hammer)
Nails
Everything else is optional. We also bought white picket fences, wood shapes and lettering all from the craft store.
Step 1: The Base

Fitting the sticky tiles into place
First things first, you should plan out how big you want your cage. We decided to go to Home Depot and buy a piece of wood that was 2 ft by 4 ft. Even numbers make everything easier! We also bought six wooden rods to help hold up the second floor. (You don't have to build a second floor). We bought long, thin pieces of wood to act as walls to help hold the stuffing in on his cage. You wanna drill from the bottom, the walls onto the main floor.
Next, we decided to buy the peel and stick tiles. This makes for easier cleanup. You want to place those in and make sure they are secured tightly.
Step 2: Securing the Second Floor (Optional)

Drilling in the wooden rods from the bottom.
You could totally skip this step if you are not too keen on having a second floor for your furry critter. But if you are interested, you want to drill in your wooden rods in from the bottom, nice and tight so they aren't loose. We chose to use four in the back and two in the front. This will hold up our second floor and not take up too much space on the first.
Step 3: Attaching the Second Floor

Marking the spot to drill and then drilling from top to bottom.Step
You want to build your second floor the same way you did with the bottom. But you want make sure you leave a cut-out in the small wall for your critter to safely get in and out. In our case, we just left the whole front wall off until we decided on where we wanted our staircase to go. Go ahead and drill from the top of the floor down into the wooden rods. Once all rods have been secured, don't forget to tile your second floor.
Step 4: Adding the Picket Fences

attaching the picket fencesHow cage should look after
Here's where the fun begins. I chose white picket fences to line the entire cage because it gave it more of a home feel. This step is easy. All you need is a hot glue gun and glue. We glued the white picket fences all around the cage. We were careful not to get it on the top of the fences or inside- you don't want your critter to eat it! As you can see, we put the small wood wall up on the second floor and left an opening for us to attach the staircase. Attach your fences to the top floor as well.
Here is what your cage should look like at this point!
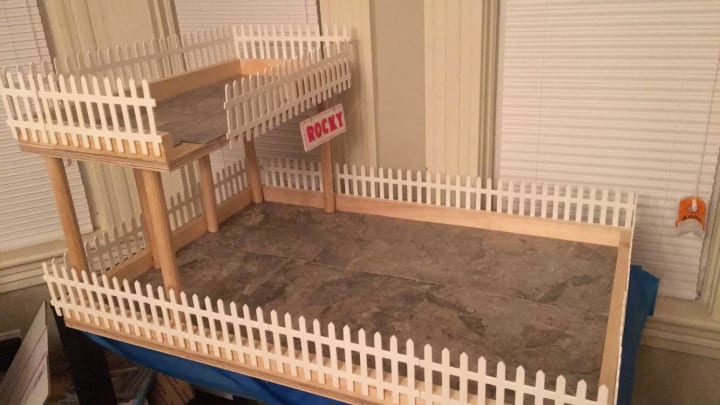
Cage update after first 4 steps.
Your tile is in place as well as your wooden rods and your fencing is secured.
Step 5: The Staircase

Attaching the staircase.
Now this step is tricky. We decided to buy two bendable log-walks off amazon and glued them together. We then drilled them in at the top as well as the bottom to the landing on the left. The landing on the left is just a box of wood and we attached fabric on it. We also bought a piece of wood to slant down to the floor from the landing and just glued small pieces of wood on it for our critter to grip as they walked up. Once you have this step down, your're practically at the end!
Step 6: Adding More Fences

Basic Cage Unfinished
Now you just want to make sure your critter is secured when using your crafty staircase, so go ahead and put on some more of those white picket fences to prevent any falls!
Step 7: Design and Decorate!

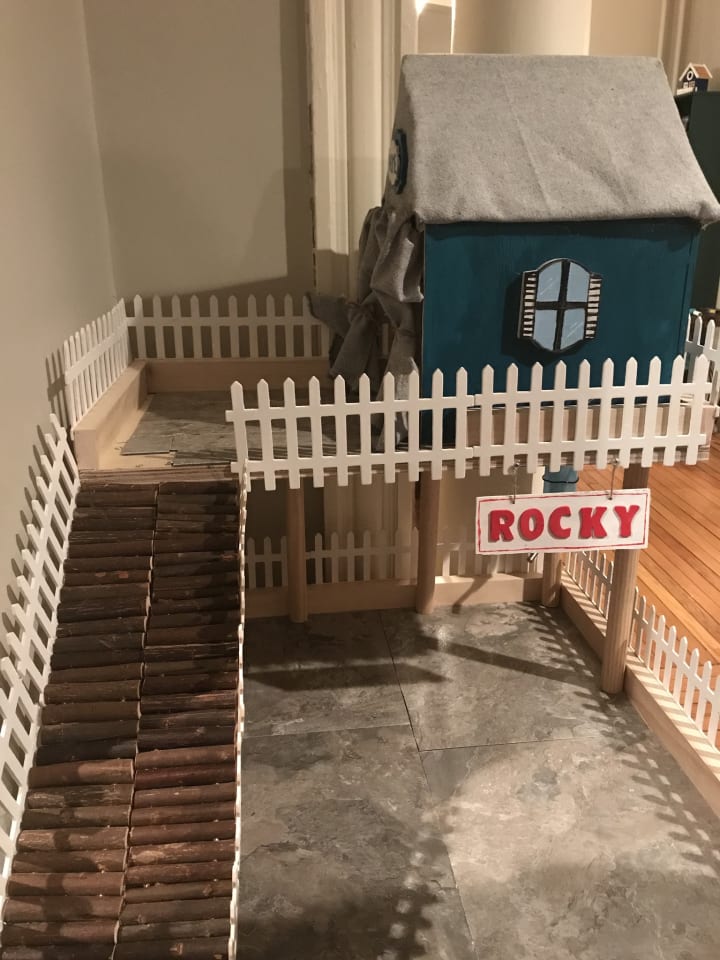
Cage Built and Finished
Here is where the fun shapes and letters come into play from the craft store: We chose an anchor and a crown as well as built him a sign with his name on it. The house on the second floor we also built from scratch and placed that in there. Here is where you can get creative and add anything you wish to have!
I hope this helps or gives you some inspiration to your next home built cage. This cage, with everything you see in it, roughly cost us $60. Compared to the cages in the store, that's amazing! Maybe this can become a new hobby for you as it has for my fiancé and I. This cage is ready for its new resident. Just add litter and stuffing to the floors and it's all set!
You've Made It!

Rocky posing on the staircase
Side View of Second Floor and Ramp
Rocky's Home

Rocky peering from his balcony
About the Creator
Cassandra Freitas
I'm a 23 year old girl who is interested in many different things all at once! I'm a huge animal lover, spend too much time experimenting with makeup, am fascinated too easily by space and forever will be curious by the unknown.
Keep reading
More stories from Cassandra Freitas and writers in Petlife and other communities.
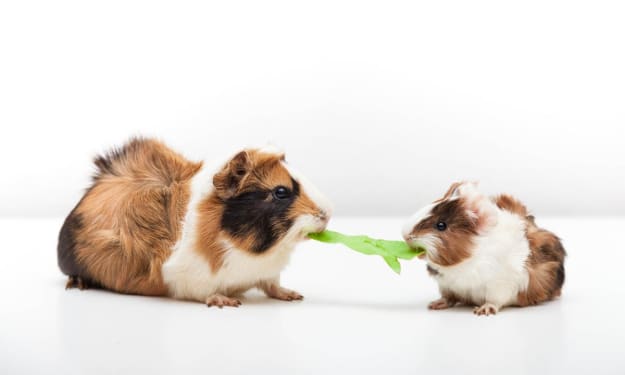
What's on Your Guinea Pig's Menu?
We spent a lot of time researching and doing trial runs with our guinea pigs to find out what they are most interested in and what they are not. If you have a guinea pig and you're curious on what to add to their diet, or you have just adopted one and need to know where to start, then you have arrived at the right place! If your reasoning is the second option, then congratulations on your newest family member(s)!
By Cassandra Freitas6 years ago in Petlife
6 Remarkable Animals Rocking Their Vibrant Colors
1. All you need to brighten up your day is to bump into this squirrel. Have you ever encountered a furry little bundle of joy that instantly brightens your day? Meet Nutty, the squirrel whose infectious energy and playful antics are guaranteed to put a smile on your face. This bushy-tailed wonder is a true master of mischief, scurrying about with a contagious zest for life that will leave you enchanted. Imagine strolling through a park, and suddenly, a flash of orange darts across your path. That's Nutty, never one to miss an opportunity for adventure. With boundless curiosity, he'll eagerly approach you, perhaps even climbing onto your shoulder or perching on your outstretched hand, eager to make a new friend. But Nutty's charm extends far beyond his adorable appearance. Watch in awe as he performs daring acrobatics, leaping from branch to branch with effortless grace, or engages in hilarious antics like chasing his own tail or playfully tossing acorns in the air. His unbridled enthusiasm is truly infectious, reminding us all to embrace the simple joys of life. Encounter Nutty, and you'll find yourself transported to a realm of pure delight, where worries melt away, and laughter becomes the language of the day. So, next time you're feeling a little down, keep your eyes peeled for this irresistible ball of energy, and let his infectious spirit brighten up your world.
By Kaly Johnesabout 6 hours ago in Petlife
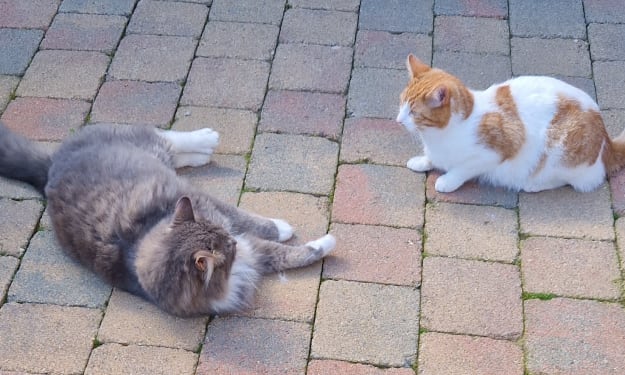
How to Train Your Cat to Use a Doormat!
Our cat Harry was twelve weeks old when we got him from Cats Protection Belfast Adoption Centre in July last year. He was part of 'the Scottish litter', so-called because the kittens had all been given Scottish names. Our kitten started life as Hamish, but we decided that Harry was more appropriate for the Ginger Prince!
By Brendan Donaghya day ago in Petlife


Comments
There are no comments for this story
Be the first to respond and start the conversation.